Hello Geek Fans! Over the past two years, countless Kiwis and people around the world have made the move to working from home. That has meant many have had to get used to collaborative tools such as Microsoft Teams. Today, we’ve put together a quick guide to get you started with this software.
Microsoft Teams has seen a huge surge in popularity over the past couple of years. It’s not rocket science to understand why a collaborative tool might have suddenly become so much more popular, but it can take some learning to find your way around this useful software. Here’s our quick guide on getting started with Microsoft Teams.
What is Microsoft Teams?
Microsoft Teams is an app that helps to bring teams together. It offers a number of in-app features, including:
- Chat
- Channels
- File editing
- Like, mention, and reply functions
- Note, website, and file sharing
- Calls and video calls
This is essentially a platform where you can plan, organise, share, and discuss your work with your team. It’s easy to use and has all the tools you need to collaborate effectively.
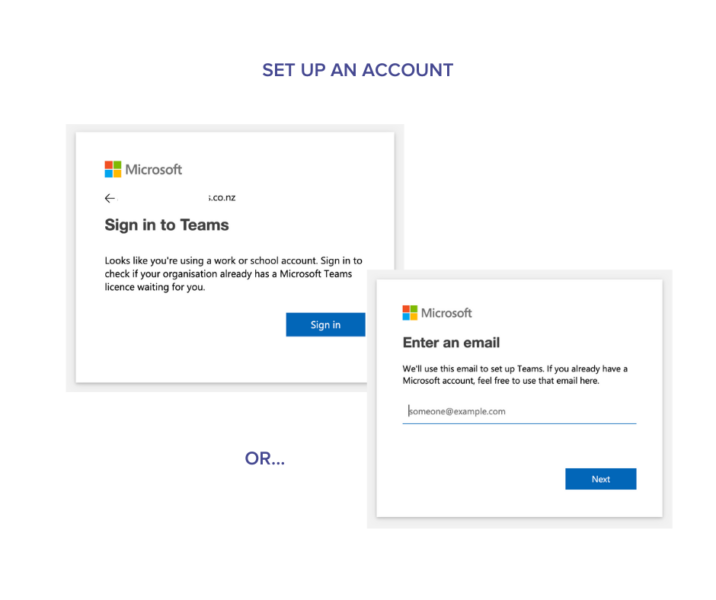
Setting up an account
If you are on a Mac, you’ll find Microsoft Teams in your applications folder. Windows computers have it under the Start tab in Windows.
When you open the app, you will either need to create a Microsoft account or sign in with an existing one.
Next, you will need to pick a Team. You’ll find this on the left side of the screen, where you can either join or create a Team. Your team could be anything from just you and one other person working on a project together, to a department, or a whole company. Whoever started the Team can invite you to join, if they haven’t already.
Getting to know Microsoft Teams
Once you have an account and your own Team, it’s time to explore. Here are the main areas you should get familiar with:
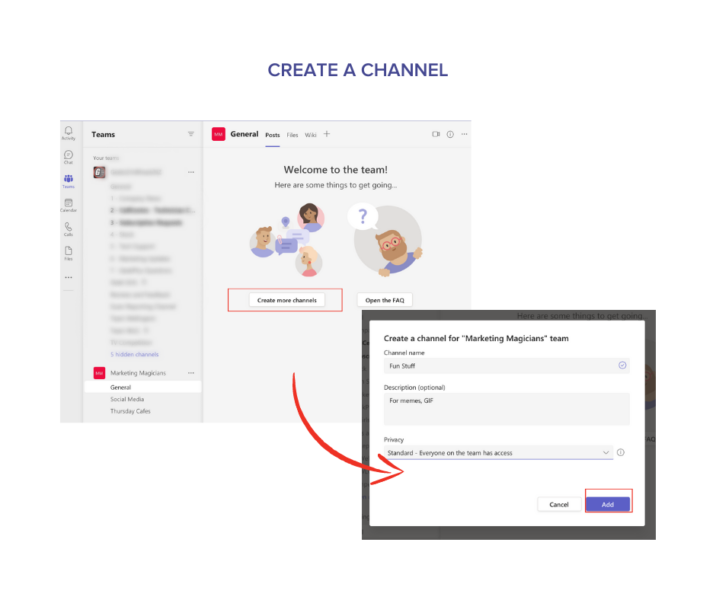
Channels
Within each of your Teams, there are channels. Let’s say you work in a small business, so everyone is on the same Team. You might have a general channel, a social channel for organising after-work drinks, a private channel for the sales staff, and a channel for a specific project.
Each channel operates as its own chat room, where any member can comment, share files, set up a meeting and more.
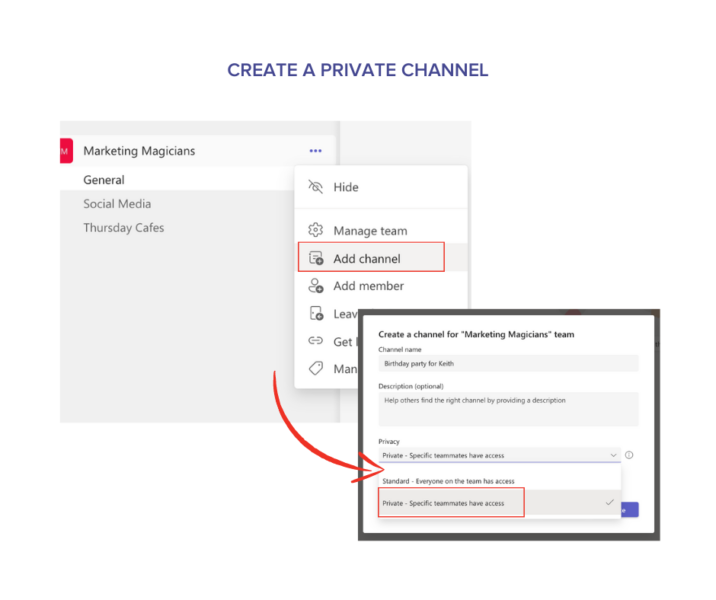
Private channels
To create a private channel, select the three dots next to your Team, and hit ‘more options’ and ‘add channel’. Once you’ve added the channel name and description, you can set the privacy settings to just certain teammates.
The next step is to hit ‘Create’, then add the teammates you want in this channel.
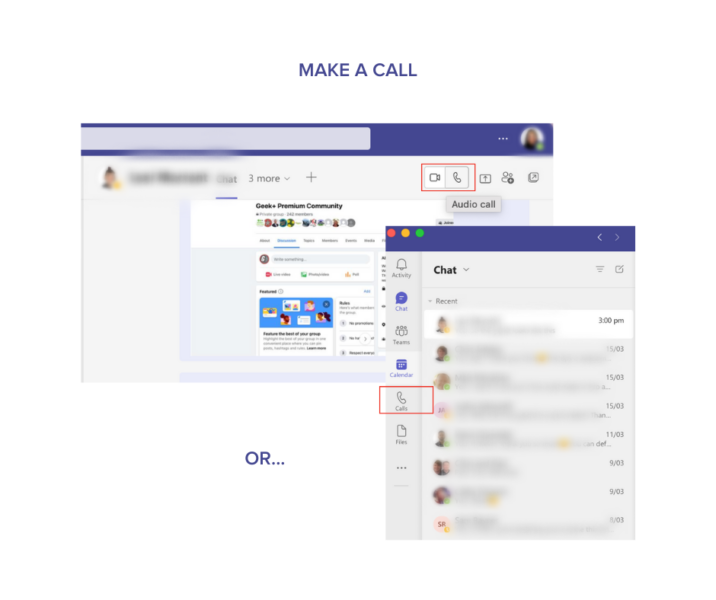
Meetings and calls
To make a private call, go to your chat list and enter the names of the people you want to call into the ‘New chat’ area. Then simply hit ‘video call’ or ‘audio call’ to get started.
To set up a meeting, select ‘Schedule a meeting’ if you are already in a chat with the meeting attendees. Alternatively, go to the Calendar on the left of the screen and select ‘New meeting’ to select a time and the invitees. You can also schedule meetings from within your Outlook desktop app.
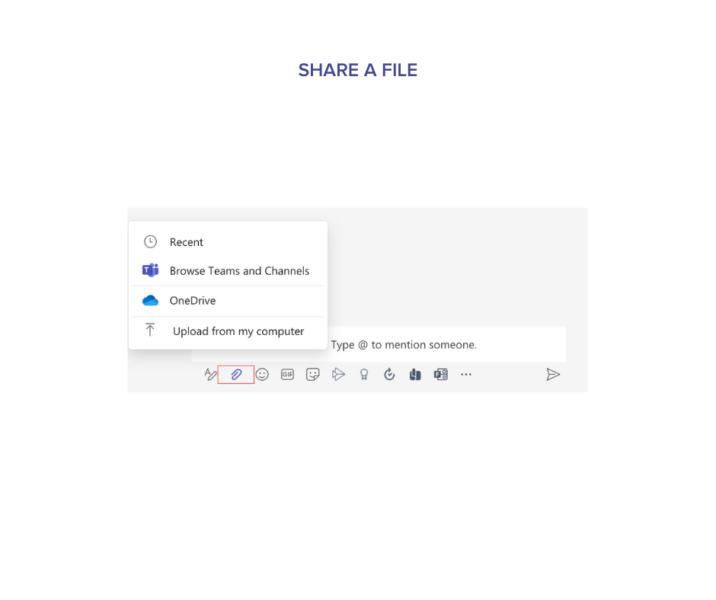
Sharing a file
To share a file, click the paperclip button on any chat screen. You’ll be able to upload it from your computer or share something that’s already on Microsoft Teams. You can also drag and drop files straight into the chat window!
For more information, browse the video tutorials and tools available with Microsoft.
Want to save time with tips? This month we’ll be sharing Microsoft Teams tips on our Facebook Page and Instagram account. Follow us to learn useful tech tips and get more out of your Microsoft Teams!
And for everything else, call 0800 4 A GEEK (0800 424 335) or Book a Geek online.