Hi Geeks! This month we’re focusing on smart devices. These clever devices can make life much easier, but many people struggle to get them set up in the first place. In this piece, we’re offering a quick guide on getting them set up and under control.
Many devices can work with Google Home – simply look for the ‘Works with Google Home’ sticker when shopping to ensure their compatibility. This way, you can connect anything from your lighting and entertainment units (such as TV and radio), to your home security and appliances (such as a fridge). This network can be as simple or as complex as you like. The first step is to get it all set up.
Related: List of Google supported smart home devices

Step 1: Setting up your smart devices
If you haven’t already done so, follow the steps provided by the device maker to set up your smart home devices.
Geeks on Wheels also offer a handy Smart Home set-up service. We not only help you with the set-up process but also train you on how to use all your smart devices, and ensure all steps are taken to make them as secure as possible.
Step 2: Connecting your smart home devices in the Google Home app
- The first step is always to check the manufacturer’s instructions on your new device. This will ensure you’re aware of any special guidance or steps you’ll need to know for that specific product or model.
- Next, download and open the Google Home app with your smartphone or tablet. It is available for Android here, and on iTunes here.
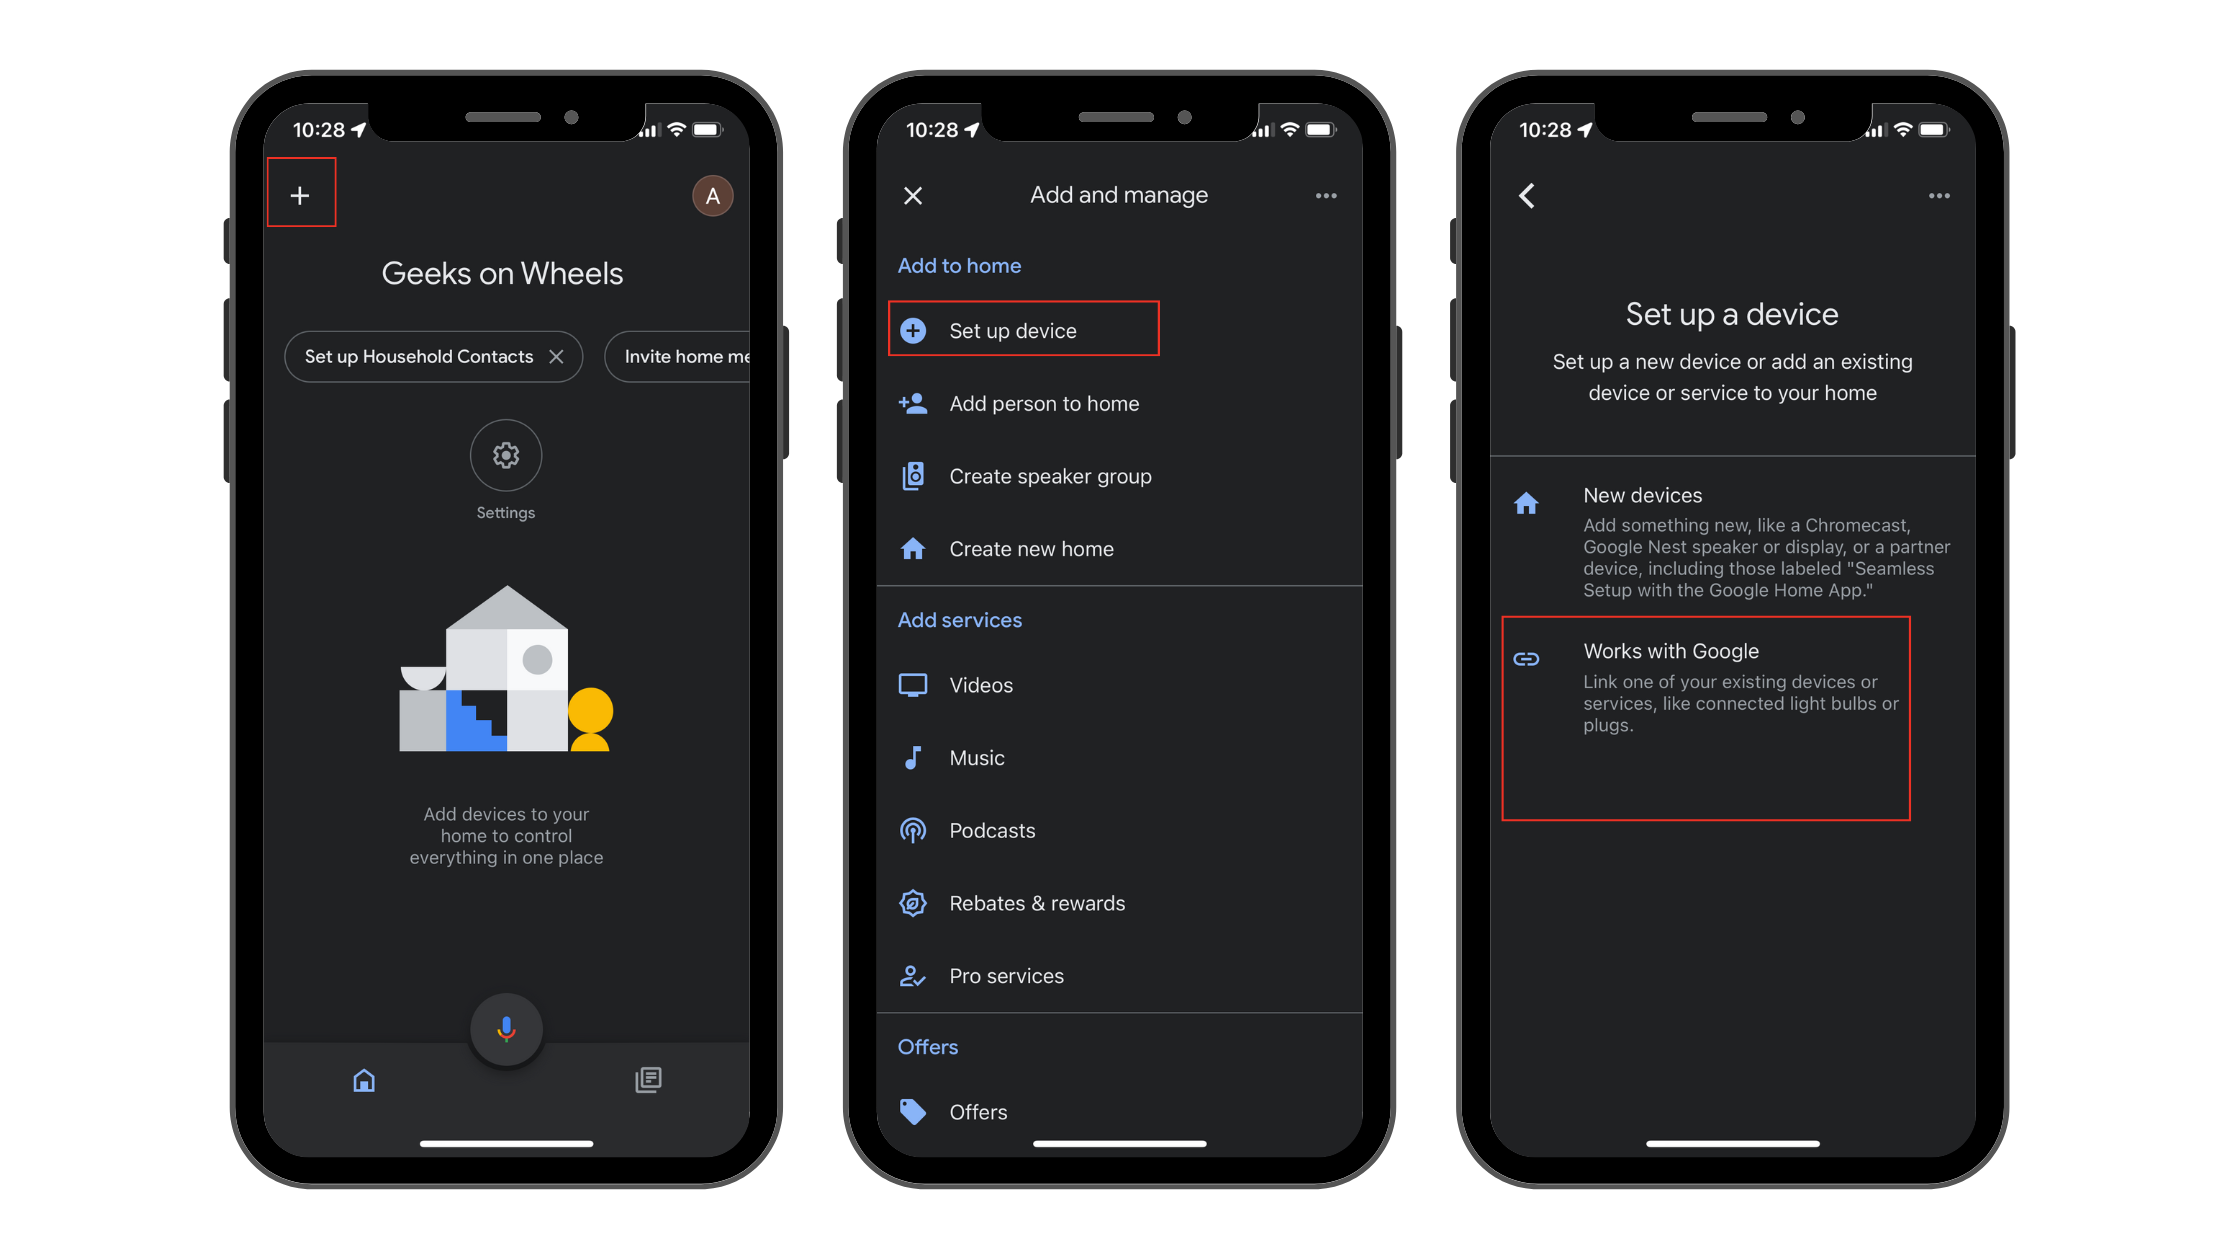
- Once the app is downloaded, open it and tap the ‘Add +’ button. Then hit ‘Set up device +’ and select ‘Works with Google’, and select the device from the list.
- The app will then prompt you for the specific device, so you’ll simply need to follow the steps on the screen.
You can complete these steps for as many smart devices as you like.
Related: How to set up Google NestMini
Step 3: Controlling and managing your smart devices
Learning how to control and manage your devices effectively can make life even easier.
1. Creating rooms
One of those management options is to create ‘rooms’. This means you can assign a device, or a number of devices, to a specific room in your home to make it easier to manage. For example, this would be useful to easily manage the smart light bulbs in your living room specifically.
To do this, enter the app, and touch and hold the chosen device’s tile. Then hit ‘Settings’, ‘Room’, and either ‘Add a custom room’ to create a new room or ‘Choose a room’. Note that you cannot add a device to more than one room at a time. However, you can change a device’s room, rename rooms, and delete rooms all within the app.
2. Rename your devices
Another feature you can use is the option to rename your smart devices. This might be helpful if your devices have technical or doubled up names that make them hard to tell apart.
To change a device’s name, touch and hold the device’s tile then hit ‘Settings’ and ‘Name’ to enter the new name.
Need a hand? Or a whole Geek?
Our Geeks are experienced in dealing with complicated technical systems. If you need help setting up Google Home with smart devices, we’re just a call away.
Our friendly Geeks can set it up, ensure it is secure, and teach you how to use it and make it work for your needs.
Book a Geek online here or give us a call on 0800 424 335.