Zoom Safety | Follow These Steps
The Geeks on Wheels team have been using Zoom for weekly meetings and to keep in touch with colleagues. We know that Zoom is safe but ONLY if you follow these necessary precautions.
We understand that many of you have been using Zoom to keep in touch with family and friends. Whether you’re doing a quiz, having a catch-up or a formal meeting, it is super important to make sure the security of your meetings isn’t compromised. That is why we have put together this helpful How-To-Guide on being SAFE whilst using zoom.
Some meetings were being interrupted by unwanted intruders and causing disruptions that were often with malicious intent. Since these outbreaks, Zoom has put in extra security measures that can be used to safeguard meetings. However, these features can be hidden away and not easily found.
Follow these steps and keep your meetings with family, friends or co-workers secure. It’s a quick and easy process. It means that you won’t have to deal with somebody you don’t know popping into your conversation.
USE A UNIQUE MEETING ID AND PASSWORD
Zoom is now automatically adding passwords to accounts. Those passwords can be embedded in the links to people’s personal profiles. For example, if you go to your Zoom profile and look for your “instant meeting” link, you’ll see it contains both your personal meeting ID and right after that, the password for the meeting. Anyone you send that link to will be able to immediately gain access to your meeting without having to separately post a password. NOTE – Do not share this link publicly as hackers can find this link and use it to come into your meeting without a password.
- From the main Zoom page, click on “My Account” in the upper-right corner, and then click “Schedule a meeting”
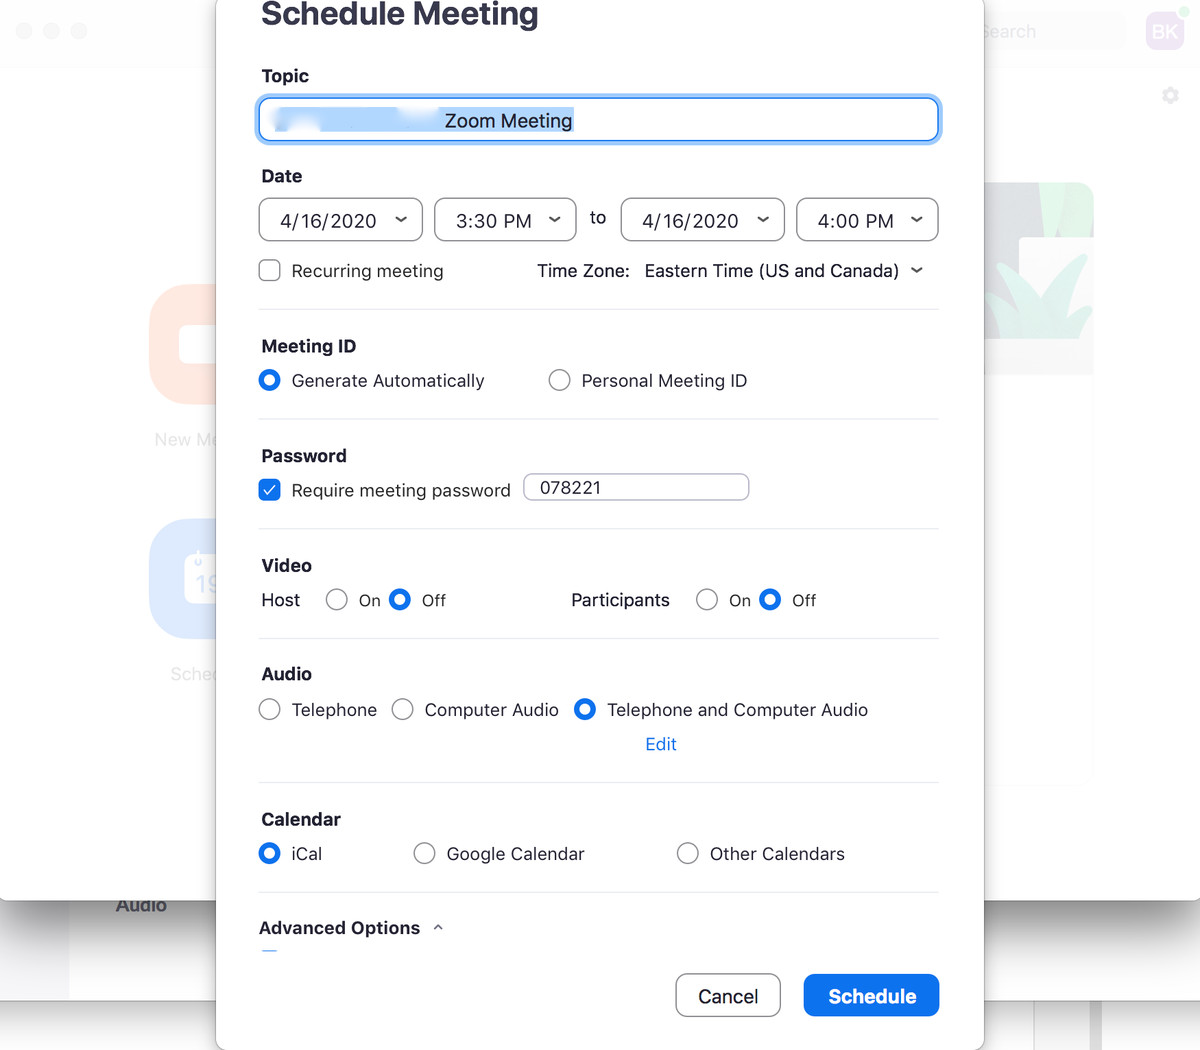
- If you wish, you can enter a meeting topic and description. Put in the date, time, and duration of your meeting. (If you’re on the free plan, you’ve got 40 minutes.)
- Look for “Meeting ID,” and select “Generate Automatically.” This will generate a unique ID for that meeting rather than use your usual meeting ID.
- Make sure “Require a password” is checked. Zoom will generate a random password, but you can also create your own.
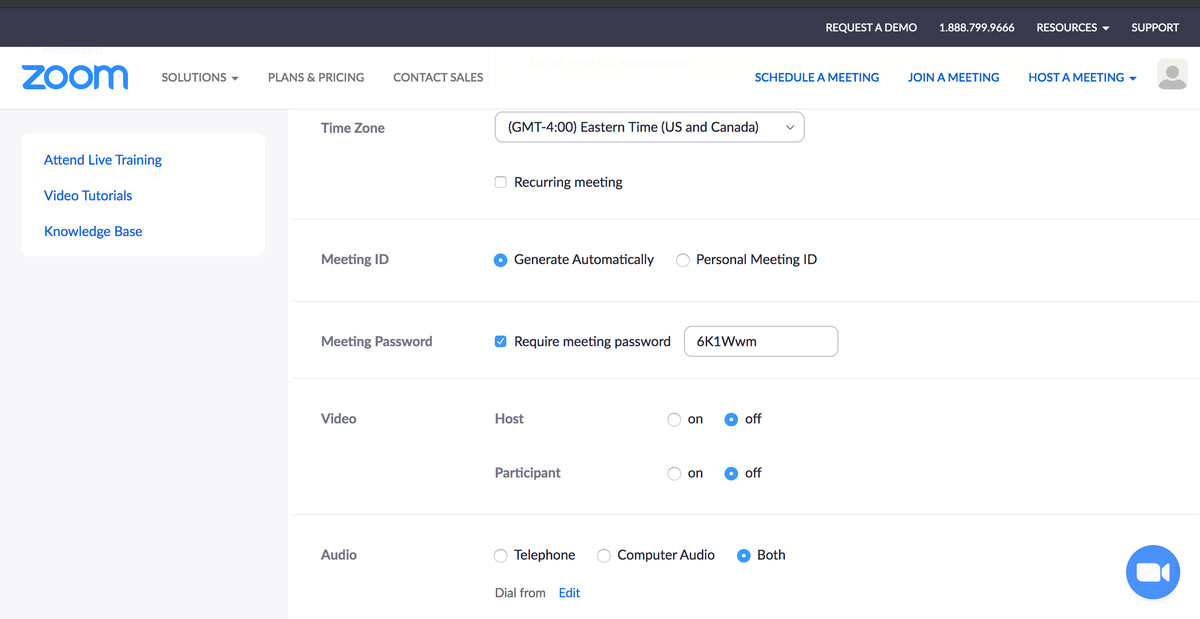
- Below that, make sure “Enable waiting room” is checked (and it’s a good idea not to check “Enable join before host” since that would let participants wander into the meeting before you do).
- Click on “Save”
- You’ll be brought to the meetings page where you will see all of the options for that meeting. Halfway down, you can click “Copy the invitation” to put all of the info into your clipboard so you can send it to your participants. When you’re ready, click on the blue “Start this Meeting” button.
If you’re using the Zoom app:
- Click on “Schedule”
- You will be offered essentially the same selections as you are in the web app. If you want to make sure the waiting room is enabled, click on “Advanced Options” at the bottom of the page.
- Click on the blue “Schedule” button
- You’ll be offered the chance to put the meeting into your calendar. After that, you’ll be brought back to the main window. The scheduled meeting will be on the right. If you want, you can click on the three dots to the right of your name to make changes or copy the invitation into your clipboard to send to your participants.
USE THE ZOOM VIRTUAL WAITING ROOM
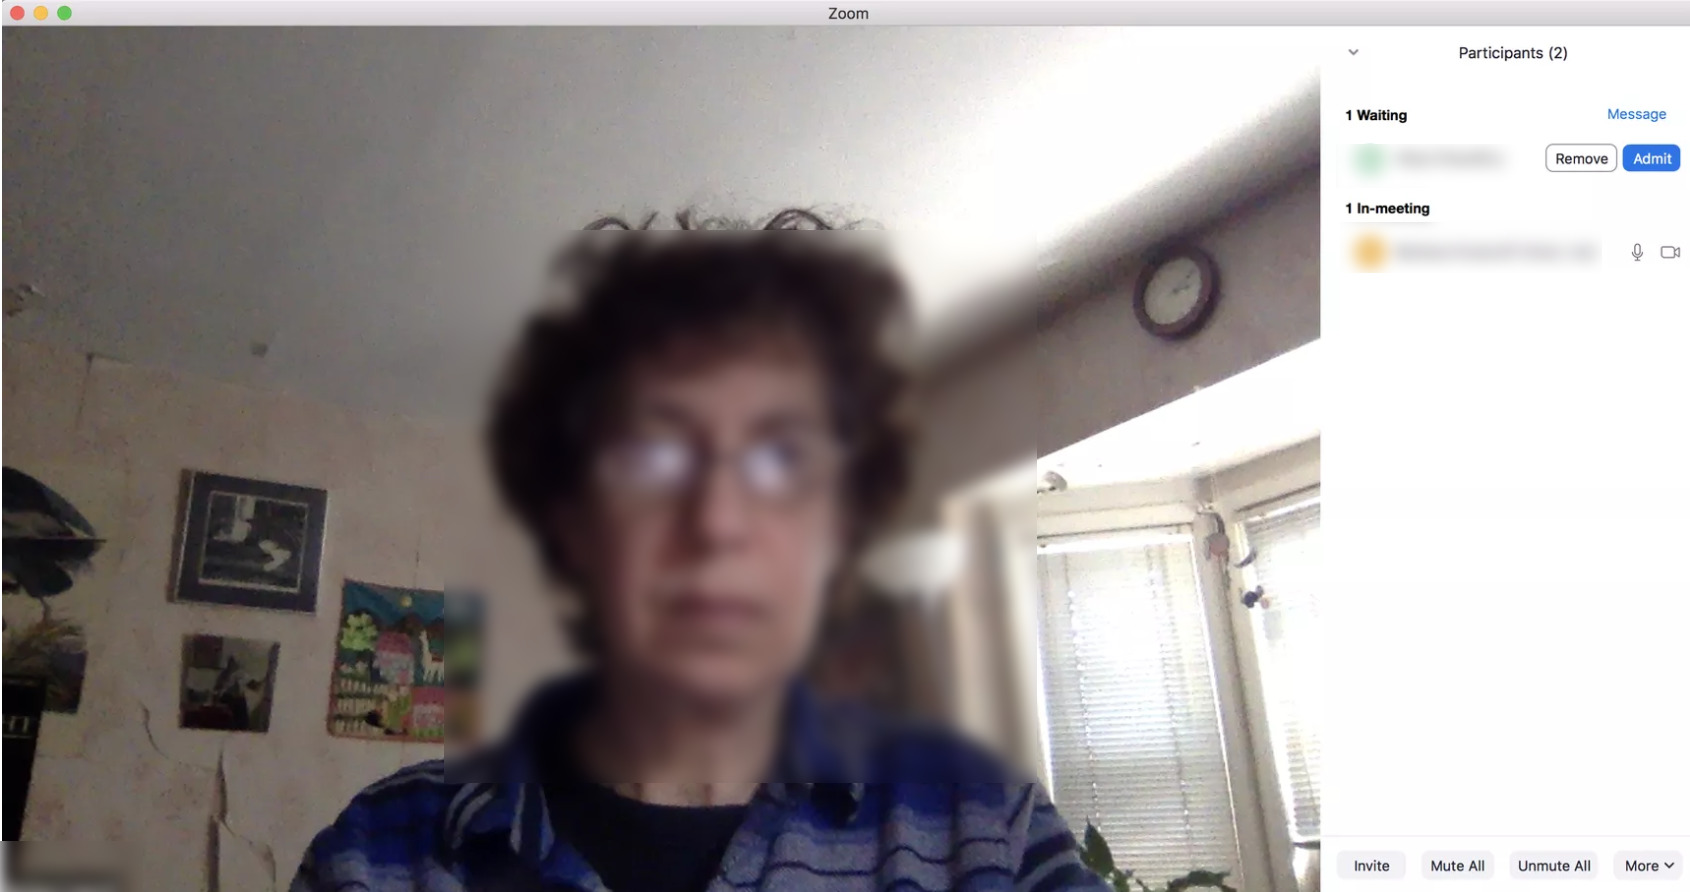
The virtual waiting room allows you to check who is trying to enter your meeting. That way you have to manually accept or decline who enters a meeting. Then there will be no surprises during your get-together.
When each participant clicks on their link, they will be asked to wait, while you will get a notification telling you that someone has entered the waiting room. You can either immediately admit them or click on “See waiting room.”

A sidebar will then show you everyone who is waiting to enter the meeting; you can then either admit them, remove them from the waiting room (and from any chance to enter the meeting), or send them a message.
If you are expecting a lot of people then you may find this a little tedious but it will ensure that no one that you don’t know shows up in the chat. It is, therefore, SAFER for you.
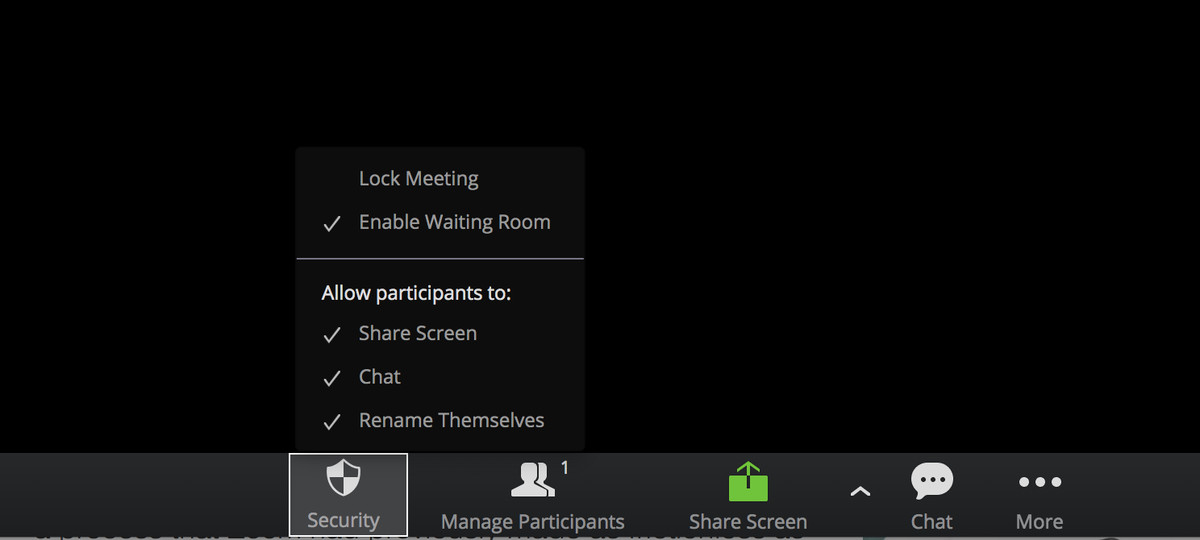
USE THE LOCK MEETING FEATURE
Once all of the participants are in the meeting you can then use the ‘Lock Meeting’ feature to ensure that nobody enters the call even if they have a meeting ID and password.

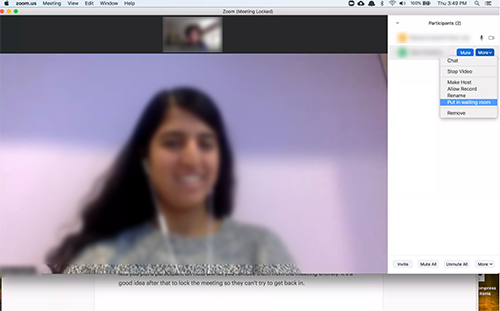
ZOOM WAITING ROOM FEATURE
One handy feature is that you can put people back in the waiting room. You may need to discuss a birthday present or a confidential part of the meeting so you can click ‘Manage Participants’ icon at the bottom of your screen. Find the names of the participants you wish to put in the waiting room and click ‘More’ > ‘Put in waiting room’. The participant will no longer have access to the meeting. In effect, they will be back in the waiting room until you decide to let them return.
KICK SOMEONE OUT
If a participant in your meeting has decided to misbehave then you can kick them out of the zoom meeting. Click on the ‘Manage Participants’ icon at the bottom of your screen. Find the name of the participant that you wish to kick out and click ‘More’ > ‘Remove.’ You can then lock the meeting so that they can’t get back in.
We urge you to follow these steps! If you are having issues with Zoom or would like some advice then call our team on 0800 424 335. They will put you in touch with one of our friendly technicians. They can get your issues sorted remotely or using our SAFE non – contact service.
Stay safe!